
 As our retailer partners find the lure of the Internet an impossible thing to resist, they face two choices with photography; use our image or take their own. Using ours is fine, but your site risks looking the same as all our other retail partners. Taking your own, well that can be just daunting. When I look back on our early product photography, well, it’s sad. Over the years we have improved tremendously, pushed in part by online partners with rigorous standards who simply would not accept the quality we presented. Getting to where we are now involved experimenting with different photography setups and taking some classes in Photoshop. Yes we tried going the professional photographer route, but between cost and more importantly the time delays, it just wasn’t a practical solution for us. In this article I hope to get you past some of the mistakes we made and share the key ingredients to a good product shot.
Before we get practical – a few basic questions we get asked:
Why is the background always white?
We didn’t start this way. When we first started we used artsy backgrounds, included props and where possible some green from nature, but we soon found that as we connected with larger online retailers there was a standard and our cute artsy photos didn’t meet it. When we take a photo we are taking it for multiple sites and while smaller independent sites may love the cool artsy backgrounds the larger sites do not. In order to create a workflow and know that the photo would work everywhere we set an internal standard – 1500 pixels by 1500 pixels – on a white background. Boring maybe, practical yes. It’s also fair to assume that the larger sites have done the work and know that white images ultimately work better. Whatever you decide, you do need some uniform standards. Once you have some, you are happy with, document your standards and stick to them.
What size should finished images be?
If they are for your website, something like 650 pixels by 650 pixels will probably do. We have partners who demand 1500 x 1500. You will find that as the years progress, technology is able to handle bigger images and consumers expect more detail. I would suggest 1500 by 1500 as a good standard size.
Why are your images always square?
We always produce square images. With white backgrounds this blends into most websites, but the consistency in size and shape means that our images always align on a website. I strongly recommend making a square image part of your standard.
Okay so you have your standards set, let’s talk equipment.
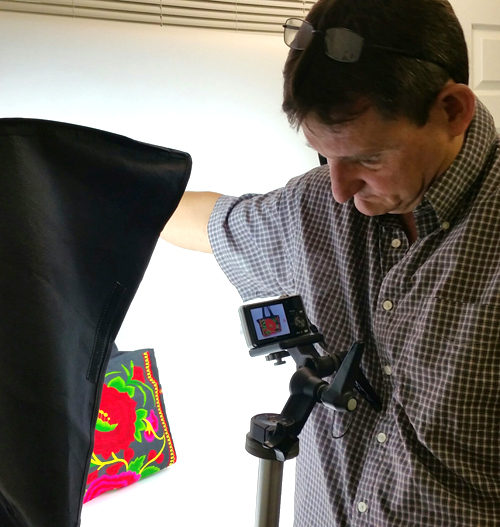
To get a good image you do need some basic equipment, ironically an expensive camera is not one of them. Modern digital cameras are pretty much all great for what we want. Try to find one with a decent macro feature for real closeups and as high a resolution as you get get for your money. We use one of the cheapest Nikon CoolPix – as of writing this you can get a better version than our 5 year old one for $69.99. One thing to watch for is the tripod connectivity, not all cameras have the threaded hole to mount on a tripod and for product photography a good tripod is probably more important than the camera. The other determining factor is the Macro capability, which most if not all digital cameras have these days.
A tripod is essential. We got a used one handed down from a family member, but new tripods start at under $20 on eBay. I am sure the lowest cost ones are also likely not to last long, but its not like you are going to move it much. Ours sits next to the photo setup and never leaves the room.
Lighting is one of the more daunting purchases you will make. We tried several setups over the years but have settled on a 2000W Photo Studio Video Photography Softbox Light Stand Continuous Lighting Kit – available from multiple sellers on eBay for around $85. These are versatile enough for a small jewelry up to people shots. We have over the years tried various light boxes but found that we really don’t need one even for jewelry.
The Setup. In order to get a white background image you need a white background. We started using poster boards but have found it much easier and cheaper over time to maintain a permanent setup using a roll of photo background paper (around $25), a 10Ft Adjustable Background Support Stand (eBay $25), and a table. Using a roll eliminates any corners you will get using flat poster boards or card. We also have a few home made pieces for props such as our earring rack, made from 2 shelf brackets and some tooth floss. Tooth floss is great as it vanishes on white backgrounds. Keep some poster board or small pieces of mirror around to deal with reflecting pesky shadows, especially a problem on silver jewelry.
This image is of our simple setup. We also have a wall with a large piece of white backdrop so we can shift to wall art or bigger pieces. If we need a lifestyle image we tend to take things home and shoot them in a setting or on a table top, a great excuse to buy some cool ethnic furniture.
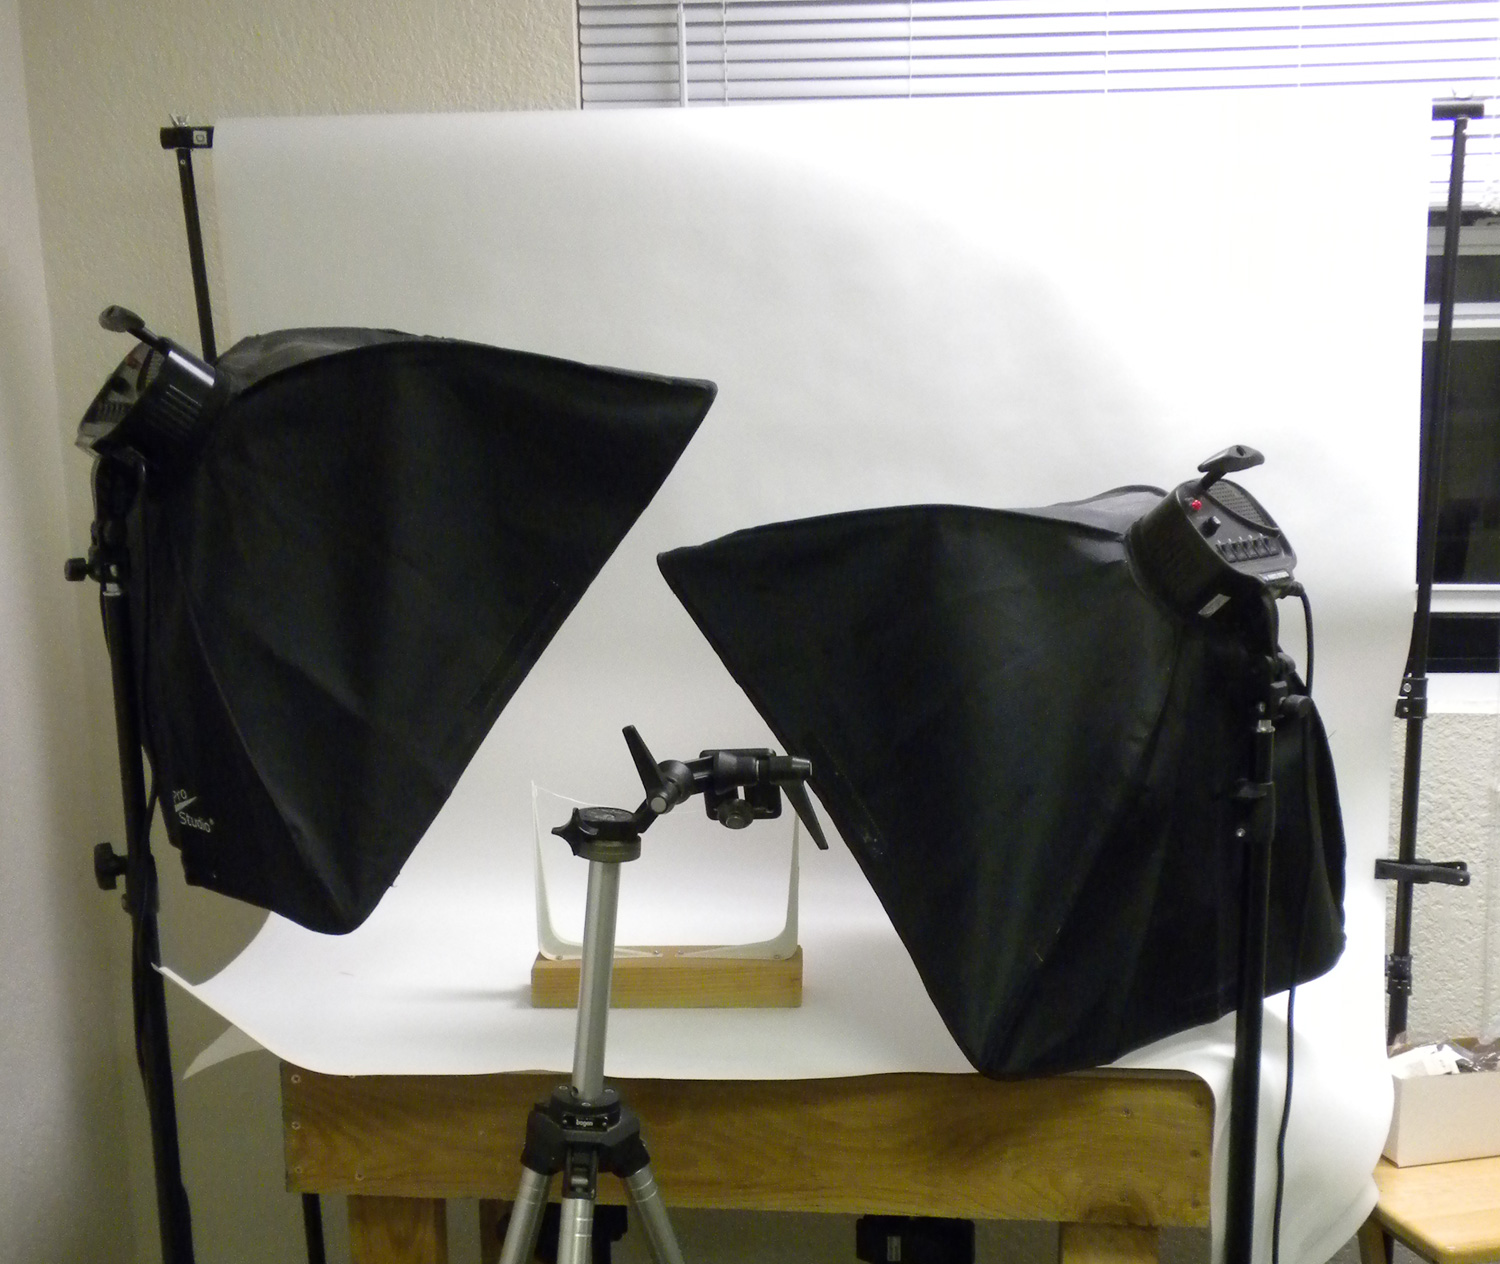
Photo Setup
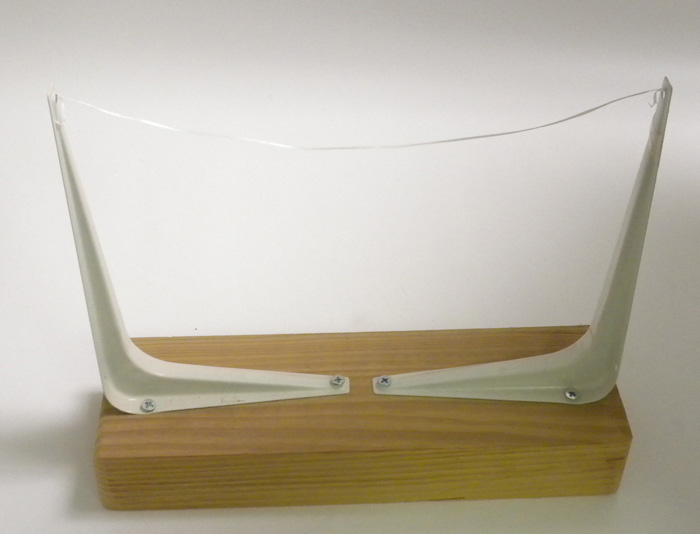
Earring Dental Floss Fixture
The video below shows the use of light and some reflective card with single defuser light – (jump to 5 min in) – YouTube is a great source of tutorials for product photography. This is just one of many I found to demonstrate the setup.
The goal is to get your image perfect but let’s be honest it rarely is. But don’t worry, that’s where Photoshop comes in. In the next video we will take a decent image and turn it into a great image using a very old version of Photoshop CS2, you can also use GIMP https://www.gimp.org which is free. If you are using Gimp or a newer version of Photoshop the features demonstrated will exist but may be in different locations.
But What About Lifestyle Images?
 Needless to say, while a white background is practical if the image is going to potentially meet the needs of a lot of different websites, you may want the images to present your sense of style. We asked Priscilla Schleigh, owner of Giraffe, how she goes about getting such stunning images for her site.
“I took most of the photos with my iPhone with natural light on the front porch of my old location,” Priscilla wrote. “Now I am not sure I know where to take the photos as the new place has no front porch. Over that last 10 years I have worked with so many website folks and spent lots of money on people that have told me to use the tents and different ways to photo things.
“Several years ago I just started taking photos on the porch in natural light and liked the results better. (it was on the advise of my niece who was in in graphic design school at the time. She was right.) Consistency is the main thing on a website, and with the new phones you can take all photo in the square size and they usually work for websites.”
While perfection is never possible and we are certainly not professional photographers, we hope these tips get you up and running and save you some time, heartache and cash.